When it comes to grocery shopping, I'd like to think I'm a pretty organized person. I write out a list and mostly stick to it. The only exception is Costco. I can never leave that store without a few additional items in my cart that are new to the store or that I find while browsing the aisles.
A lot of times that also means I find inspiration for new recipes by discovering ingredients while out shopping. It is often that these finds will make my wheels start turning and I come up with ideas on the spot. Usually my poor husband is on the receiving end with recipes spewing out of my mouth as we continue our grocery haul. I do have to give him credit though, he always listens patiently and gives good constructive criticism, but I'm sure many times he would rather roll his eyes at his crazy wife.

Finding a big bag of dried blueberries at Costco was my inspiration for today's recipe. I kept thinking along the lines of cookies, but after inspecting my pantry and seeing a big jar of coconut oil and a bag of white chocolate chips the idea for a muffin recipe was born. While most blueberry muffins are made with fresh berries, the dried version works extremely well in this recipe and adds a lot of flavor without adding the extra liquid or discoloring the finished product. The addition of coconut oil over a more traditional canola oil added the slightest hint of coconut without overpowering the finished baked good, along with giving the muffins a light and airy texture.
A simple lemon powdered sugar glaze provides a nice contrast of flavors while adding a bit of tartness to the muffins, but you could certainly serve them as is. This recipe got two giant thumbs up in our family and has since been added to our favorites list.
Blueberries and Cream Muffins with Lemon Glaze
~makes about 15 muffins~
(Print this Recipe)
Ingredients:
For the muffins:
2 cups all purpose flour
3/4 cup sugar
1/2 tsp. baking powder
1/2 tsp. baking soda
1/2 tsp. kosher salt
2 eggs
1 cup sour cream
1/2 cup coconut oil, melted
1/4 cup milk (almond milk is ok)
1 tsp. vanilla
1 cup dried blueberries
1/2 cup white chocolate chips
For the glaze:
1 tsp. lemon zest
2 Tbsp. lemon juice
3/4 cup powdered sugar
Directions:
For the muffins: Pre-heat oven to 375° F. Line a muffin tin with cupcake liners OR grease well. Set aside.
In a large bowl whisk together flour, sugar, baking powder, baking soda, and kosher salt.
In another bowl combine eggs, sour cream, coconut oil, milk, and vanilla.
Add the wet ingredients to the dry ingredients and stir to combine.
Fold in blueberries and white chocolate chips.
Divide the batter equally among the muffin cups filling each about 3/4 full and bake in preheated oven for 20 minutes. Remove and let cool on a wire rack.
For the glaze: Whisk together lemon zest, lemon juice and powdered sugar until smooth. Drizzle over cooled muffins.
Notes: I used Nutiva Organic Extra Virgin coconut oil in these muffins. I found my giant container at Costco, but you can also find it online.
When using lemon zest in a recipe, I like to use an organic lemon. Most grocery stores carry them and they don't cost much more than conventional ones.
A Susi's Kochen und Backen Original Recipe
I have come to the conclusion that
many times when people claim they don't like to eat certain vegetables,
it really means they probably have never had it prepared in a way that
would appeal to them. With so many different options and recipes
available on how to turn an otherwise boring vegetable into a
showstopper, it makes it hard to believe that an aversion against a
certain food couldn't be overturned.
I think Cauliflower is a great example.
By simply steaming the vegetable you end up with a "blah" version that
can be kind of tasteless, but because of its mild flavor it can also be
extremely versatile and lend itself to a lot of different and tasty
applications. Recently there has been a surge in popularity for
cauliflower. The florets are low in fat and carbs, high in fiber, folic
acid and vitamin C, which makes this vegetable a winner in my book. If
you perform a quick search, you can find an amazing variety of recipes.
They range from roasted cauliflower, gratins, soups, dips, faux alfredo
sauces and even pizza crust. While I've tried quite a few of these
different versions, cauliflower pizza crust is still one that eludes me,
but I will never say never.
A few weeks ago I made Canadian Bacon Cauliflower Cheddar Cups
for my family with great results, so I decided to experiment a little
more and came up with this delicious mashed version. I started with a
basic recipe, but by adding sweet, roasted garlic along with tangy and
tart goat cheese, the dish was elevated to a whole new level. I achieved
the desired consistency with my food processor, but an immersion
blender or even a good old fashioned potato masher should do the trick
as well. I served this with grilled steak and a big side salad, but ate
leftovers with a couple of over-easy eggs the next day and had to
restrain myself from licking the plate. So tasty, so simple, and most
definitely one of my new favorites.
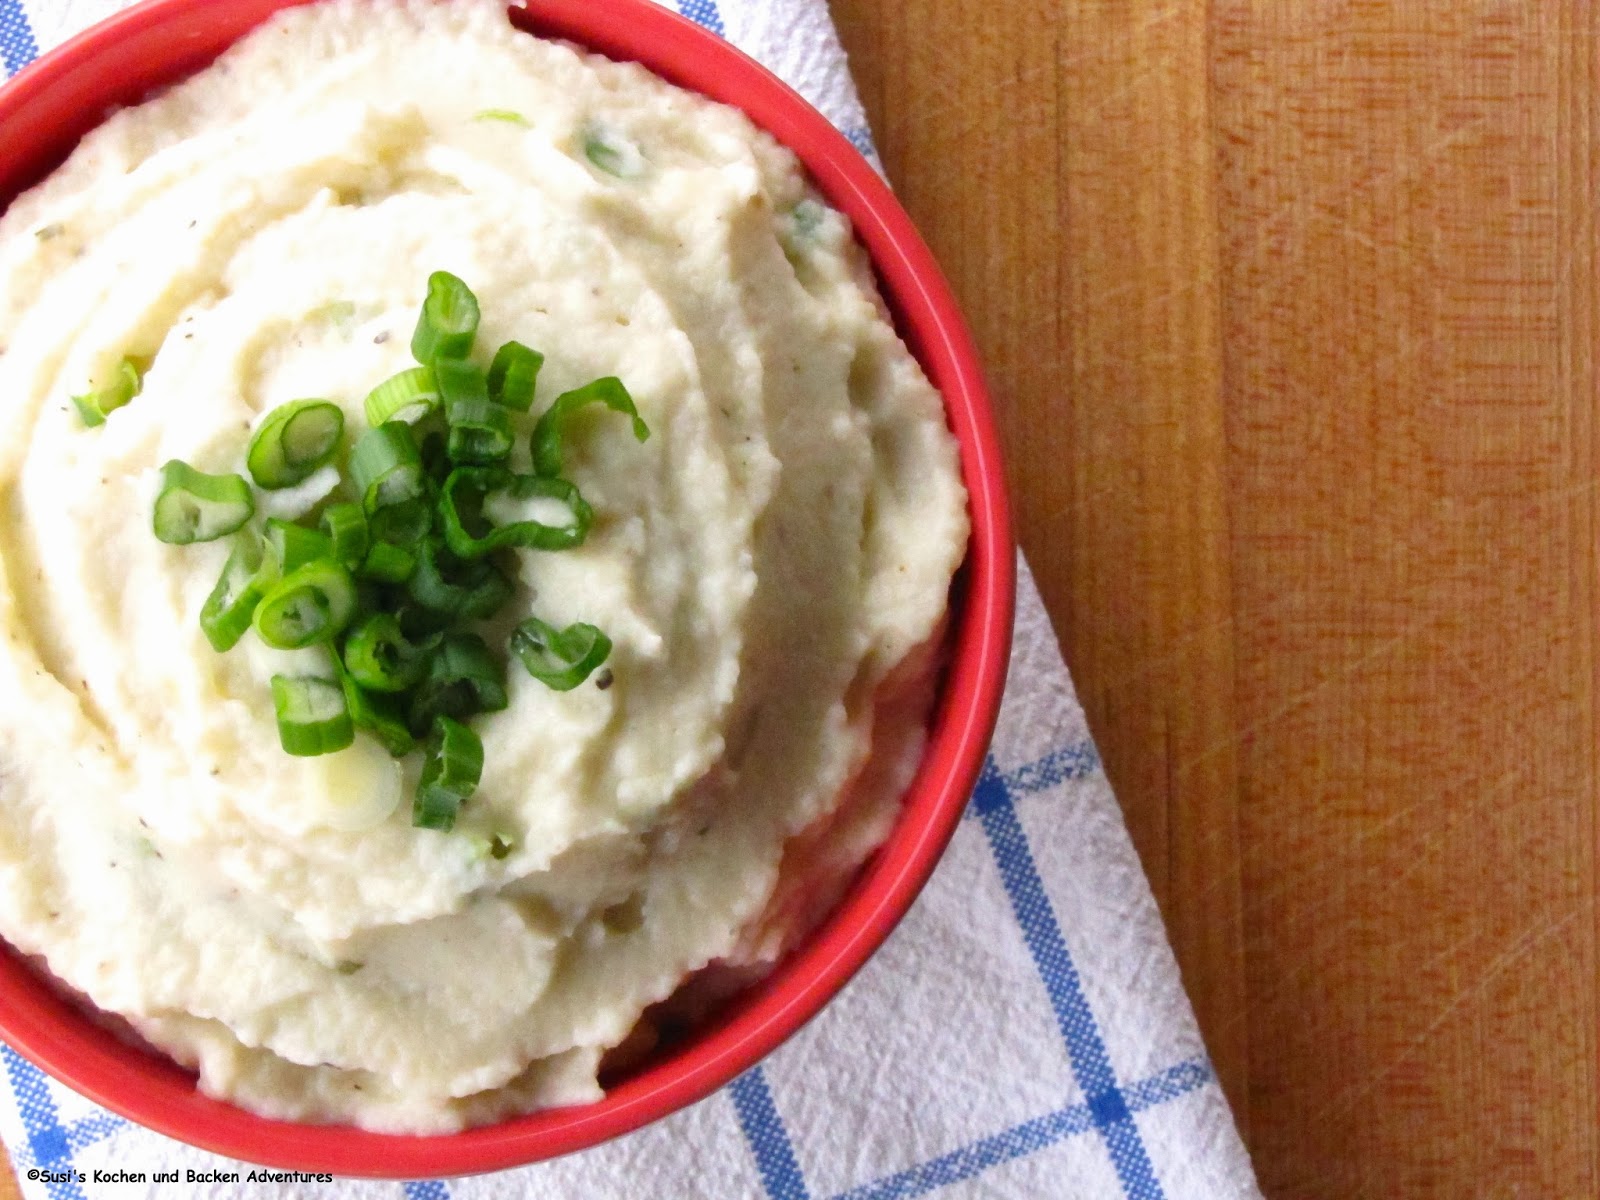
Mashed Cauliflower with Roasted Garlic & Goat Cheese
~makes 5-6 servings~
(Print this Recipe)
Ingredients:
5-6 cups cauliflower florets (about 1 medium head)
1 vegetable bouillon cube
8-10 roasted garlic cloves (see notes)
4 Tbsp. soft goat cheese
1/8 tsp. grated nutmeg
Kosher Salt and Pepper to taste
4 Tbsp. green onions, chopped
Directions:
Roast garlic (see note), remove cloves from skin and set aside.
On the stove-top, add
cauliflower to a pot, fill with about 4 cups of water. Add the vegetable
bouillon cube and steam/cook cauliflower until soft. Drain the
cauliflower and add to a food processor.
Process cauliflower along with the
roasted garlic cloves, goat cheese, 1/2 tsp. salt, 1/4 tsp. pepper and
1/8 tsp. nutmeg until smooth.
Transfer mixture to a bowl, check for
additional salt and pepper and fold in 3 Tbsp. of the green onions.
Sprinkle with additional reserved onions and serve immediately.
Notes: To roast the garlic,
preheat oven to 400° F. Take one whole garlic bulb and cut 1/4 to 1/2
inch off the top. Lay on a piece of aluminum foil big enough to wrap the
head of garlic, drizzle with about 1 tsp. of olive oil and season
lightly with salt and pepper. Wrap it in the foil and roast in preheated
oven for 35-45 minutes or until garlic is soft and golden brown. Let
cool for about 15 minutes before handling. Use your fingers or a fork to
squeeze and pull roasted garlic out of the skin.
If you don't like the taste of goat cheese, cream cheese would also be an acceptable substitution.
A Susi's Kochen und Backen Original Recipe
Valentine's Day is only a few days away and everywhere you look you are being inundated with chocolate desserts. Don't get me wrong, I like chocolate as much as the next person, but over the years my taste buds are definitely changing. These days I find myself gravitating towards fruit based desserts more often than not. There is just something about the combination of sweet and slightly sour or tart that seems to go oh so well together.
As far as desserts go, today's recipe comes together quickly and ranks high in the fruit satisfaction department. Store bought puff pastry sheets, a creamy no-bake cheesecake filling laced with a luscious lemon curd and topped with glorious sweet, red raspberries. Perfection! I made my own lemon curd following my recipe for Meyer Lemon Curd, but store bought is a perfectly fine substitution and will help to streamline the process.
The combination of flaky crust, creamy filling, and fresh fruit makes this dessert irresistible in my book. This is the perfect alternative for all of you non-chocolate lovers (like my husband) and I don't think that the chocolate connoisseurs would even mind a slice of this beautiful tart.
Rustic Raspberry Lemon Cheesecake Tart
~makes 1 tart~
(Print this Recipe)
Ingredients:
1 sheet puff pastry, thawed but still cold
4 oz. cream cheese, softened
1/3 cup sugar, plus more for sprinkling
2 Tbsp. heavy cream
1/3 cup lemon curd, homemade or store-bought
1 pint raspberries
1/4 cup seedless raspberry jam, warmed
Powdered sugar
Directions:
For the tart: Preheat oven to 425° F. Line a baking sheet with parchment paper or a Silpat baking mat. Unfold the thawed out puff pastry on a lightly flour dusted area and gently roll into a 10x11 inch rectangle. Carefully transfer to your baking sheet.
Brush edges with a little bit of water and fold over all 4 sides to create a lip. Using a fork, poke holes all over the center of your tart. Gently brush the entire tart with an egg wash and sprinkle about 2 tsp. of sugar over the center. Bake until golden brown, about 15-20 minutes. Remove from oven and carefully with the back of a spoon press the center back down if it has puffed. Transfer to a wire rack to cool.
For the filling: In a bowl combine softened cream cheese and sugar. Mix with a hand-mixer or by hand until smooth and the sugar is well incorporated. Add the heavy cream and mix for about 1 minute. Fold in the lemon curd.
To assemble the tart: Carefully spread your lemon cheesecake mixture over the center of your cooled tart crust. Arrange berries decoratively over the curd and drizzle with the warmed jam. Dust the tart with powdered sugar.
Notes: This tart is best made and eaten on the same day. You can prepare the tart along with the cheesecake filling ahead of time. Refrigerate the filling and assemble the tart right before eating.
Other berries would be lovely as well. I bet blueberries, strawberries, blackberries or a combination would also be great!
A Susi's Kochen und Backen Original Recipe
At least once a week my 16 year old asks me to make him brownies. He really doesn't care what kind of brownies as long as they are rich, fudgy and most definitely none of that "cakey brownie nonsense". More often than not I laugh off his request since let's face it, if he had his choice, every day would be brownie day. However, once in a while I cave in and deliver, which makes me his favorite person in the world for at least that day!
Superbowl Sunday was a perfect occasion to add a little sweet treat to our menu that would also appease my brownie loving boy. So I spent way too much time pouring over recipes on Pinterest to find a brownie that would fit all the requirements of my 16 year old. Before I knew it, I had wasted spent an hour looking for "the one" when I came across these brownies.
Rich and dense looking with a delicious frosting AND sprinkles. My teenager was sold. What was even more appealing to me was the one-bowl approach of the brownies itself, meaning they come together fast and without dirtying a lot of dishes. Once the brownies are cooled, the frosting is whipped up quickly and you have a scrumptious dessert in no time. Score for mom, mission accomplished!
Homemade Brownies with Funfetti Frosting
~makes one 9x13 pan~
(Print this Recipe)
Ingredients:
Brownies:
1 cup (2 sticks) unsalted butter, melted
1 cup unsweetened cocoa powder
2 cups granulated sugar
4 large eggs
1 Tbsp. vanilla extract
1/4 tsp. salt
1 1/2 cups flour
12 oz (ish) jar hot fudge sauce
Frosting:
2 sticks unsalted butter, slightly softened
4 cups powdered sugar
1 Tbsp. and 2 tsp Butter Vanilla Emulsion
1/4 cup heavy whipping cream
2/3 cup ice cream sprinkles (find them near the ice cream)
Directions:
Preheat
oven to 350. Line a 9x13 pan with foil (it makes the brownies easier to remove) and spray with cooking spray. Set aside.
In
a large bowl, whisk together the cocoa and melted butter. Stir in sugar
until combined. Stir in eggs, one at a time, mixing well after each.
Stir in vanilla and salt. Fold in flour JUST until you no longer see flour
streaks in the batter. Gently fold in hot fudge sauce (you may need to
heat it just enough to spoon/pour out of jar).
Spread
batter in prepared pan and bake for about 20 minutes. Brownies will
look cakey on top and feel very dense -- that is normal. Let brownies
cool completely.
Prepare frosting:
In
the bowl of your mixer, beat butter and butter vanilla emulsion on
medium speed until smooth. Slowly add powdered sugar, a little at a
time, until just combined. Add heavy cream and beat on high for about 1
minute, until fluffy and smooth. Fold in sprinkles.
Frost cooled brownies. For best results, cover and refrigerate for several hours or preferably overnight.
Note: Don't skip the butter vanilla emulsion as it lends the "funfetti" flavor to the frosting. You can either buy it online or find it at your local Walmart in the cake decorating/supply section.
Adapted from: Confessions of a Cookbook Queen