Pages

Wednesday, March 31, 2010

Toasted Coconut Custard Tart


This is the story of the  Tart that was almost not meant to be. It certainly cost me a few more gray hairs, that's for sure. I wanted to make this Coconut Custard Tart for our 18th wedding anniversary since my husband loves desserts with coconut (hence the Perfect Party Cake he chose for his birthday). I picked this dessert out of Dorie Greenspan's book; Baking: From My Home to Yours since none of her recipes have disappointed me so far. Plus, when I saw sweet tart crust filled with a smooth coconut studded pastry cream and topped with a rum infused whipped cream I was pretty much in love.

The day started out well and I was cruising along with my sweet tart dough. It's practically flour, powdered sugar, butter and one egg yolk, pulsed in a food processor until it all comes together. The dough is then pressed into a tart pan with a removable bottom, which is then put in the freezer for a bit before baking. Once my dough went into the freezer I started on the custard. It is pretty much a standard custard with milk, egg yolks, sugar and cornstarch with the only exception being a pinch of coriander. The mix gets cooked until thick, then you add butter, dark rum and vanilla. Toasted coconut gets folded in and the custard gets chilled until ready for filling.


This is when my perfect baking process started to go awry. I put the pastry lined tart pan in the oven and set my timer for 25 minutes. I guess I had forgotten to press start after I had set my timer and didn't realize my mistake until I smelled something burning. Yes, you guessed it, the sweet tart dough was a loss.
Since I was determined to make my husband this dessert I set out to re-make my tart crust. Everything came together perfect, just like the first time. This time though I didn't mess up my timer and the crust was baked to perfection. I took it out and set it on a rack to cool. After about half an hour when I returned to un-mold the crust, the sides came out off the tart pan great but when I tried to slide it off the removable bottom tray the whole crust crumbled apart on me. There was no saving this one. At this point I was ready to just call it a day and admit defeat when my middle child told me that I could get it done and "3rd times a charm".


So for the third time in one day I made the sweet tart dough. From now on I can most certainly bake this tart dough in my sleep. Finally I had reached success. Everything came together at last. The crust was beautiful, the filling delicious and the topping of whipped cream along with a little more rum, vanilla and powdered sugar plus more toasted coconut turned this into anything but your grandma's coconut cream pie. Success after all and at least my husband is certainly worth the effort after 18 years. Happy Anniversary Honey!!!

Tuesday, March 30, 2010

Snappy Deviled Eggs


Deviled Eggs and Easter go together hand in hand. My kids love them and so do I. My husband who is not the world's biggest egg fan will not touch most deviled eggs but he will eat mine. The secret to mine that makes them irresistible to him is plain old hot sauce, which will take any deviled egg to the next level.

Deviled eggs are an easy, portable (especially if you have a carrier) party or celebration food and I guarantee that your plate will always be empty when you return home. 

First the eggs are hard boiled. I find that if the eggs are a few days old rather than very fresh ones they peel much better. The eggs are then cut and the egg yolk is scooped out and mixed with mayonnaise, sour cream, mustard, vinegar and of course hot sauce. I really like the taste of Louisiana Hot Sauce but any kind you like will do.  In order to provide the smoothest, creamiest consistency I use my trusty immersion blender. After the mixture is blended well I fill it into a piping bag with a big star tip and pipe it back into the egg halves. You can also use a round tip or in a pinch, use a ziploc bag and just snip the corner off your bag to the desired size, then pipe away. After the eggs are filled, I sprinkle them with a little bit of sharp paprika for an additional little kick. 

I hope you'll give my snappy eggs a try, who knows, maybe you'll be able to convert an egg-hater as well.


Snappy Deviled Eggs
~makes 20 halves~

Ingredients:
10 large eggs, hard boiled
1/3 cup mayonnaise
1 tablespoon sour cream
2 teaspoons prepared mustard
1 teaspoon vinegar
1-2 teaspoons hot sauce (your favorite kind)
Salt and Pepper to taste
Paprika for sprinkling (optional)

Directions:
Peel and halve hard boiled eggs lengthwise and remove yolks. Place yolks in a bowl along with mayonnaise, sour cream, mustard, vinegar and hot sauce. With the immersion blender mix everything to desired consistency (you can use a fork and mash if you don't have a blender). Season with salt and pepper. Pipe egg mixture back into egg halves. Garnish with paprika.


Monday, March 29, 2010

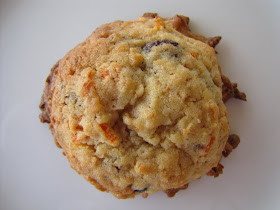
Gingered Carrot Cookies


For this weeks BWD: Baking with Dorie Challenge, it was Grapefruit's pick and she decided on Gingered Carrot Cookies on Page 162 in Dorie Greenspan's Baking: From my home to yours

When Grapefruit emailed me a while back about her pick I have to honestly admit that I wasn't thrilled. Ginger isn't my most favorite spice and after reading through the recipe and finding that it had raisins in it as well,  I decided right there and then I was not going to like this cookie. In fact I told my husband this one was going to be all his to take to work.

I guess I owe Grapefruit and Dorie Greenspan a giant apology. These cookies were anything but ordinary and they are in fact out of this world. My oldest child who hates raisins was scarfing these cookies down without complaint and needless to say my husband didn't get to take any of them to work.

The cookies are almost like a mini carrot cake minus most of the normal carrot cake spices. It only calls for ginger and a little bit of freshly grated nutmeg, but it is packed full of flavor with grated carrots (I shredded them), coconut, toasted pecans and raisins. My husband kept saying it was the most perfect mix of flavors that keeps you wanting more and more.


The cookie dough is pretty simple with butter, sugar, egg, vanilla and a flour mixture, but by adding all these other wonderful ingredients it takes the cookie from ordinary to extraordinary. One thing I was really glad to have with this cookie is my trusty Kitchen Aid stand mixer. Without it I think you either need some serious muscles or hope your motor won't burn out on a little hand mixer as the dough gets really dense towards the end.

Baking time for these cookies was spot on for me and as always, Dorie's instructions are precise and easy to follow. Fresh out of the oven the cookie had a nice crunch with a soft interior probably due to minimal spreading during baking, but even the next day which turned the cookie more "chewy" overall it was still good. This cookie now has a permanent spot in my cookie file and will be made many more times in the future. So thank you Grapefruit for picking this cookie and thank you Dorie for inventing it. This cookie has easily made it into my top 20 all time favorite cookies.

Check out Grapefruit's page for the recipe and Elizabeth's page to see what they thought about this cookie and what new and interesting things they came up with.

For our next BWD in two weeks (the 12th of April) it is Grapefruit's pick yet again with Lots-of-Ways Banana Cake on Page 204 and 205. So if any of this has peeked your interest and you want to join the fun with us next time, just shoot me or Grapefruit an email and we'd be more than happy to have you.

Friday, March 26, 2010

David Lebovitz's Vanilla Ice Cream


Just like a great brownie or chocolate chip recipe, everyone needs a great homemade vanilla ice cream recipe in their repertoire. I'm sure a lot of people are saying now that you can buy ice cream at the grocery store so much easier and cheaper, and I'm here to tell you that you are absolutely correct. Sure you can get any mass manufactured pumped full of air ice cream at the store. Sure it is definitely cheaper than making it homemade but I challenge you to try this recipe and I'm sure you will never go back unless it is 2:00 am and you really need your ice cream fix.

I have made a few homemade ice creams over the years. As with many things you make or try out, the ice creams were good especially fresh out of the ice cream maker but, once I put the ice cream in a container and froze it for a few hours it turned hard as a rock. I own a few ice cream books since we eat a lot of it during the summer months. Anything from a rich ice cream to a refreshing sorbet or Granita is loved and eaten in our house. We like it all, probably because it gets really, really hot here during the summer months and any kind of cooling confection is welcome.


On my quest for the perfect ice cream I kept stumbling on this David Lebovitz guy.  After further examination I was intrigued and decided to order his book: The Perfect Scoop. When it arrived I spent several hours drooling over all of the scrumptious recipes. I was so torn of what to make first but Vanilla won out. I settled on the custard style vanilla but David also has a recipe for the quicker Philadelphia style (which is egg-less) in his book. He also recommends adding a little bit of alcohol to the finished custard before freezing it in the ice cream maker which will help with the texture once totally frozen and will prevent it from hardening too much.

I decided that Frangelico was the perfect accompaniment to my Vanilla Ice Cream but I could see this with any other liqueurs or even brandy. This is most definitely the BEST ice cream I have EVER made homemade.  The flavor and texture are incredible. I served this ice cream with our Peanut Butter Swirl Brownies and it was decadent. This recipe will be a staple from now on in my freezer and I can't wait to try some of his other recipes in the book. So if you really love delicious ice cream, order David's book (you won't be disappointed) or you can find his recipe for Vanilla Ice cream HERE.


Thursday, March 25, 2010

Chicken-Zucchini Alfredo


With the weather heating up and pool season approaching you will start to find some lighter recipes on this blog along with all the other decadent dishes. Cooking light can be quite a challenge for a lot of people. One of the biggest complaints of "cooking light" are the pre-conceived misconceptions that meals will taste boring and bland. If that was the case, my family wouldn't eat any of it but since no meal in our house has ever gone uneaten, I can assure you cooking light, done the right way, is anything but boring and bland.

A lot of times eating light in the summer time is quite easy for us. My husband is amazing on his grills (yes grills, he has several). So many times it is a simple side salad and a grilled "white" meat like chicken, pork, or seafood. But sometimes despite the heat of the southwest I crave comfort food that is rich and creamy tasting. When I found Ellie Krieger's recipe I knew I had to make it. With a few substitutions I had cooked a fantastic meal that was very well received all the way around.

The recipe is pretty straight forward and comes together in about 30 minutes which is always great, since I don't like spending as much time in the kitchen when the weather is so nice. This dish has all the flavor and taste that a "normal" Alfredo recipe would have but with a lot less fat. If you are trying to eat healthier and don't want to give up comfort then give this recipe a try. You can find Ellie's original recipe on Food Network or if you like my substitutions you can try my version.


Chicken-Zucchini Alfredo
~serves 6-8~
Ingredients:
Kosher Salt
3 tablespoons extra-virgin olive oil, divided
1/2 medium onion, finely chopped
2 cloves garlic, minced
3 (about 1 pound) zucchini, thinly sliced into half-moons
5 (4 ounce) thin skinless, boneless chicken breasts
Kosher Salt and Pepper
16 ounces fettuccine
2 1/2 tablespoons all-purpose flour
1 1/2 cups cold low-fat (1%) milk
1 1/2 cups (12 ounce can) low-fat evaporated milk
1 1/2 cups freshly shredded Parmesan cheese
1/4 cup fresh parsley, chopped

Directions:
Bring a large pot of salted water to a boil. Heat 1 tablespoon olive oil in a nonstick skillet over medium heat. Add onion, cook until translucent, then add 1 clove garlic and cook for another 30 seconds. Add the zucchini, cover and cook until tender, stirring, about 4 minutes. Transfer to a bowl.

Heat another tablespoon oil in the same skillet over medium-high heat. Season the chicken with kosher salt and pepper and cook through, 4 to 7 minutes per side depending on thickness of meat. Transfer to a plate.

Cook the pasta in the boiling water as the label directs. Drain, reserving 1 cup cooking water; return pasta to the pot to keep warm.

Meanwhile, whisk the flour and low-fat milk in a bowl. Place the remaining 1 clove garlic and 1 tablespoon olive oil in the skillet and cook over medium-high heat, 30 second. Add the flour-milk mixture and bring to a boil, stirring. Reduce the heat to low and cook, stirring, 2 minutes. Add the evaporated milk, salt to taste and the cheese; stir to melt, about 1 minute.

Cut the chicken into strips. Toss with the pasta, sauce, zucchini-onion mixture and parsley, adding the reserved pasta water as needed to loosen (you might only need 1/2 to 3/4 cup). Serve immediately.

Adapted from: Ellie Krieger for Food Network Magazine


Wednesday, March 24, 2010

Peanut Butter Swirl Brownies


Just like a great Chocolate Chip cookie recipe, every household needs fantastic brownie recipes. Since the weekend was approaching and my kids only get dessert on those days, I like to find something that they truly enjoy and brownies are one of those things. I've made countless brownie recipes over the years; anything made-from-scratch to store bought boxed mixes. While most of them were edible, none of them blew us away.

Since I started this blog I keep getting requests from the kids about things to make. Brownies was one of them. I figured I'll have to kiss a few frogs try a few recipes until I find "the one". I had just gone to the store so one of the requirements had to be that I had everything on hand for the recipe since I didn't want to run out again. Dorie Greenspan had some mouthwatering recipes in her book that I will try in the future but all of them seemed more time and ingredient consuming than I was willing to put in this time. Finally I stopped at one of Martha Stewart's recipes: Peanut Butter Swirl Brownies.


A quick read through the recipe and I knew I had everything on hand for them plus the brownies didn't seem too involved either which was perfect. The recipe is straight forward; Chocolate, butter, eggs, sugar, and a little flour. The longest part of this recipe is to melt the chocolate and butter over a double boiler. The rest is put together quickly. The peanut butter swirl mix is combined by hand and then dropped in little dollops on top of the brownie batter in two additions, then swirled with a knife before baking.

These brownies were great! They were cakey, but also fudgey. The chocolate part wasn't cloyingly sweet and the peanut butter swirl gave a nice contrast with a little saltiness. We really enjoyed these brownies, especially with a scoop of homemade vanilla ice cream (this recipe will be featured soon).
 I will most definitely add this brownie to my recipe file for future desserts. As far as this being "the one" ? I'm not sure yet, I guess you'll have to stayed tuned for future brownie adventures.

You can find the recipe in Martha Stewart's book: Martha Stewart's cookies which has a ton of fantastic recipes, or in the case of this brownie you can find it on Martha Stewart's Website as well.


Tuesday, March 23, 2010

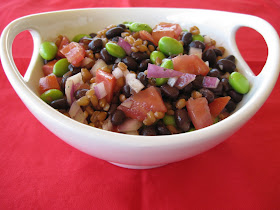
Black Bean, Edamame and Wheat Berry Salad


Let me tell you about my newest favorite salad (be warned, you might hear this statement over and over again this summer). Flipping through the pages of my newest Food Network Magazine I came across this picture of a salad that sparked my interest. Mind you, this wasn't a "normal" recipe for the magazine but rather an advertisement for Pompeian Olive Oil and Vinegar. I got all excited upon closer inspection since this salad had two of my favorite ingredients in it - wheat berries  and Edamame.

I told my husband about my find and he didn't share my enthusiasm. In fact he was kind of reserved when he heard about the wheat berries. Of course though, once I'm determined to try something new there is no stopping me and this was no exception. The salad is very filling and full of protein due to the black beans and Edamame and full of fiber due to the wheat berries* , but by adding the tomatoes and vinaigrette it keeps the recipe light and balanced. This salad has summer BBQ and potluck written all over it and since it is a non-mayo based recipe, this is the perfect side dish to bring to any occasion.

I served this alongside Avocado BLT's which made it a wonderful meal. And in case you're wondering how the salad was received by my husband and kids? They LOVED it, as did I. I kept hearing lots of moaning and "Oh, this is so good, you have to make it again". This salad is going into my regular rotation of summer salads and will be making an appearance again soon.

*I found the wheat berries at my local grocery store in their health food bulk section, but you can also find them at other health food stores or even online from Bob's Red Mill.


Black Bean, Edamame and Wheat Berry Salad
~serves 6-8~
Ingredients:
4 cups water
1/2 cup dry wheat berries
1 (15 ounce) can black beans, drained and rinsed
1 cup frozen shelled Edamame, thawed
1 cup fresh tomatoes, chopped
1/2 cup red onion, finely chopped
2 tablespoons extra virgin olive oil
3 tablespoons red wine vinegar
1/2 teaspoon mustard
1/2 teaspoon sugar
Kosher Salt and Pepper to taste


Directions:
Combine water and wheat berries in a medium saucepan, bring to a boil. Reduce heat; cover and simmer 55 minutes or until wheat berries are tender. Place in a fine mesh strainer, run under cold water to cool quickly, drain.

Combine the wheat berries with remaining ingredients in a medium bowl. Serve immediately or cover with plastic wrap and refrigerate up to 8 hours in advance.


Monday, March 22, 2010

7-Up Pound Cake


My husband does not like chocolate desserts. In fact there are very few he will even try, so I always look for recipes that appeal to him as well. Looking through one of my old Cook's Country magazines I came across a recipe that I just knew he would love, 7UP Pound cake.

Except for the 7UP most of the ingredients mirror traditional pound cakes. The addition of 7UP provides citric acid (it tenderizes) and carbonation (which lifts) to the cake which in turn makes the crumb of the cake tight but light; where a normal pound cake can actually be quite dense. Another difference in this cake is the play on the 7UP flavors with additional lemon juice, lime juice, and the zest of both which are added to the batter.

In most pound cakes the eggs are creamed with butter and sugar, but with the addition of the extra acid from the fresh fruit it would curdle the batter and turn the finished product into a gummy mess. So Cook's Country figured out a method to use melted butter which will coat and protect the gluten. Another difference in this recipe is that it is almost made exclusively in the food processor rather than a stand mixer which ensures the emulsification. 

All of this along with a fantastic glaze (powdered sugar, lemon, and lime juice) turned this into a big, buttery cake, that had a forceful lemon-lime flavor worthy of the 7UP name. Best of all, my family and especially my husband enjoyed this pound cake very much.


7-UP Pound Cake

Ingredients:
Cake:
2 1/2 cups granulated sugar
5 large eggs, at room temperature
1/2 cup 7-UP, at room temperature*
1 tablespoon grated lemon zest
2 tablespoons fresh lemon juice
1 tablespoon grated lime zest
2 tablespoons fresh lime juice
1/2 teaspoon salt
20 tablespoons (2 1/2 sticks) unsalted butter, melted and cooled slightly
3 1/4 cups cake flour

Glaze:
1 1/2 cups confectioners' sugar
1 1/2 tablespoons fresh lemon juice
1 1/2 tablespoons fresh lime juice

*Instead of 7-UP other lemon lime sodas like the following may be used: Sprite, Mountain Dew or Sierra Mist. Just make sure it isn't Diet as that will turn the cake pale and tough.

Directions:
Adjust oven rack to lower middle position and heat oven to 300 degrees F. Grease and flour a 12-cup non-stick tube pan. Process sugar, eggs, 7UP, lemon zest and juice, lime zest and juice, and salt in food processor until smooth. With machine running, slowly pour in butter and process until incorporated. Transfer to large bowl. Add flour in tree additions, whisking until combined.

Spread batter in prepared pan. Gently tap pan on counter. Bake until toothpick inserted in center comes out clean, 75 to 90 minutes. Cool cake in pan 10 minutes, then turn out onto wire rack to cool completely, about 2 hours.

Whisk confectioners' sugar, lemon juice, and lime juice in bowl until smooth. Pour glaze over cooled cake. Let glaze set 10 minutes. Serve. (Cake can be stored wrapped or in a cake container for 3 days at room temperature).


Friday, March 19, 2010

Devils Food Cupcakes with Swiss Meringue Buttercream


My oldest child wanted to take something for her AP Chemistry class on the last day of school before spring break. After several of her class mates asked her if she could bring mom's cupcakes I agreed to make a batch of Devils Food Cupcakes with Swiss Meringue Buttercream to send along.

According to the empty cupcake container I'm guessing the cupcakes were a hit. I had made a few extra to keep at home for my younger two and they really enjoyed them as well. The cupcake part is chocolaty without being too sweet. The cake is moist with a light crumb. This is definitely one of my very basic cupcake recipes that I keep using over and over as it is so accommodating especially once you add frosting.

You have so many options when it comes to a basic chocolate cupcake. Anything from chocolate ganache to a buttercream will work with this versatile cupcake. This time though I decided on a simple Swiss Meringue buttercream. I prefer this buttercream over traditional buttercream that is made with butter and powdered sugar. The Swiss Meringue is not nearly as sweet and because of the method used it tastes fluffier and smoother to me. Another plus of this buttercream is that it holds up very well to piping. If you've never had this kind you need to give it a try and I wouldn't be surprised if you never go back to plain old buttercream.


Devils Food Cupcakes with Swiss Meringue Buttercream
~makes approx. 24 cupcakes~

Ingredients:
2 cups all-purpose flour
1/2 cup unsweetened cocoa powder
1 1/2 teaspoons baking soda
1/2 teaspoon salt
1 cup granulated sugar
1 cup firmly packed light brown sugar
12 Tablespoons (1 1/2 sticks) unsalted butter, at room temperature
2 large eggs, at room temperature
2 teaspoons vanilla extract
1/2 cup lukewarm water
1/2 cup buttermilk
Swiss Meringue Buttercream (Recipe follows)

Directions:
Position a rack in the middle of the oven and preheat to 350 degrees F. Line two standard 12-cup muffin pans with paper or foil liners.

Sift together the flour, cocoa powder, baking soda, and salt into a bowl. In another bowl, with an electric mixer on medium-high speed, beat the granulated sugar, brown sugar, and butter together until light and fluffy, 2-3 minutes. Add the eggs and vanilla and beat until combined. Add the flour mixture in 3 additions, alternating with the water and buttermilk, beating on low speed until just combined; scraping down the sides of the bowl as needed. Beat on medium-high speed just until no traces of flour remain, about 30 seconds; do not over-beat. 

Divide the batter evenly among the prepared muffin ups, filling each about three-fourths full. Bake until a toothpick inserted into the center of a cupcake comes out clean, 18-20 minutes. Let the cupcakes cool in the pan on a wire rack for 5 minutes. Transfer the cupcakes to the wire rack and let cool completely.  Spread or pipe on frosting.


Swiss Meringue Buttercream
~makes about 5 cups~
Ingredients:
5 large egg whites
1 cup plus 2 tablespoons granulated sugar
Pinch of salt
1 pound (4 sticks) unsalted butter, cut into tablespoons, at room temperature
1 1/2 teaspoons vanilla extract

Directions:
Combine egg whites, sugar, and salt in the heatproof bowl of a standing mixer set over a pan of simmering water. Whisk constantly by hand until mixture is warm to the touch and sugar has dissolved (the mixture should feel completely smooth when rubbed between your fingertips).

Attach the bowl to the mixer fitted with the whisk attachment. Starting on low and gradually increasing to medium-high speed, whisk until stiff (but not dry) peaks form. Continue mixing until the mixture is fluffy and glossy, and completely cool (test by touching the bottom of the bowl), about 10 minutes.

With mixer on medium-low speed, add the butter a few tablespoons at a time, mixing well after each addition. Once all butter has been added, whisk in vanilla. Switch to the paddle attachment, and continue beating on low speed until all air bubbles are eliminated, about 2 minutes. Scrape down sides of bowl with a flexible spatula, and continue beating until the frosting is completely smooth. Keep buttercream at room temperature if using the same day, or transfer to an airtight container and refrigerate up to 3 days or freeze up to 1 month. Before using, bring to room temperature and beat with paddle attachment on low speed until smooth again, about 5 minutes.

Optional: 
To tint buttercream, reserve some for toning down the color, if necessary. Add gel-paste food color, a drop at  a time (or use the toothpick or skewer to add food color a dab at a time) to the remaining buttercream. You can use a single shade of food color or experiment my mixing two or more. Blend after each addition with the mixer (use the paddle attachment), until desired shade is achieved. Avoid adding too much food color too soon, as the hue will intensify with continued stirring; if necessary, you can tone down the shade by mixing in some reserved untinted buttercream.


Thursday, March 18, 2010

Springtime Shell Salad


We are a barbecuing family and since it is barbecue weather year round where I live, I'm always looking for side salad recipes. I have quite some in my recipe files and I'm sure that I will be sharing them with you throughout the next several months. You will be finding recipes for pasta salads, potato salads, rice salads, grain salads and vegetable salads. Nothing is off limits in our house and we are always trying to enrich our meals with new and exciting ingredients. 

This salad came about after I decided to combine two of my favorite salads (pasta salad and English pea salad) into one. The result was delicious. Even my pea hating oldest kid loved this one and had seconds. I will be making this salad again on many more barbecue occasions.


Springtime Shell Salad
~serves 8-10~

Ingredients:
1 pound small pasta shells, cooked and drained
6 ounces medium or sharp cheddar cheese, cut in small cubes
2 cups baby peas, fresh or frozen
1 medium red pepper, chopped
1/2 medium onion, chopped
1/3 cup sweet pickle relish
1/2 cup mayonnaise
3/4 cup (6 ounces) plain yogurt
1/4 cup chopped pimientos
Salt and Pepper to taste

Directions:
In a large bowl, mix together all the ingredients. Refrigerate, covered, for at least 1 hour to develop the flavors.This salad keeps well for several days in the fridge.


Wednesday, March 17, 2010

Molten Lava Cakes with Frangelico and Nutella Centers


A mix between a flour-less chocolate cake, a souffle and a pudding, molten lava cakes are the epitome of decadence for me. As an admitted chocoholic it doesn't get much better then this but I figured why not try and take this classic dessert, which appears to have been invented in France, and take it over the top.
What better way to do so, then adding Nutella and one of my favorite liqueurs, Frangelico into the mix.

Essentially all molten lava cakes are composed of 4 main ingredients: chocolate, butter, eggs and sugar. What flavorings or centers one may add is up to each persons creativity and the possibilities are endless. I hope you'll give my version a try and let me know how it turned out.


Molten Lava Cakes with Frangelico and Nutella Centers
~serves 4~

Ingredients:
11 tablespoons unsalted Butter
4 ounces Ghirardelli 60 % Bittersweet Chocolate Baking Bar
2 ounces Ghirardelli Semi-sweet Chocolate Baking Bar
2 tablespoons Frangelico (or 1 teaspoon pure vanilla extract)
3 whole eggs
3 egg yolks
1/3 cup sugar
8 tablespoons flour
4 tablespoons Nutella
1/4 cup Hazelnuts, chopped
Strawberry Sauce (optional), recipe follows


Directions:
Preheat oven to 350 degrees F and center oven rack. Spray 4 small ramekins with cooking spray to coat evenly. 

Place butter and chocolate into a double boiler and allow to melt completely over the steaming water. Stir frequently. After the chocolate and butter are melted take them off the heat and add the Frangelico (if kids are eating, the liqueur can be replaced with 1 teaspoon of vanilla extract), stir to combine.

Place eggs and sugar into the bowl of your mixer. With the whisk attachment, mix on medium-high speed until they become light in color and thick (about 8-9 minutes). After the eggs and sugar are at the right consistency, add the flour and mix together. Pour the chocolate-butter very slowly into the egg mixture, mixing on low until well combined and a sheen develops (about 5-6 minutes).

Place your prepared ramekins onto a cooking sheet. Ladle the chocolate batter halfway up the side of each dish. Spoon 1 tablespoon of Nutella on top of the batter in each bowl. Add the remainder of the batter on top of the Nutella in each ramekin, being careful not to overfill.

Bake ramekins for 12-14 minutes or until the outside is solid and the top appears to be soft and doesn't jiggle anymore.

After the cakes are baked, remove them from the oven,  and carefully place a plate on top of each one and quickly invert it. With a kitchen towel, remove the ramekin; the cake should fall right out.

Garnish the cakes with the chopped hazelnuts and the strawberry sauce (optional).

Serve immediately. 

They also taste great with a scoop of vanilla ice cream or homemade whipped cream.


Strawberry Sauce:

8 ounces (about 12 medium) Strawberries, fresh or frozen
1 - 2 tablespoons sugar

Place strawberries in food processor and pulse until desired consistency is reached. Add as much or little sugar as needed based on sweetness of berries. Stir, and set aside.


Tuesday, March 16, 2010

Block Party Beans


Every once in a while I get an email from my husband that tells me he has "snack day" at work and if I could put it on my calendar. This in turn also means that I have to come up with something to send with him. He usually requests a savory dish since by his account there are always more than enough sweet dishes there. 

Dips or Salsas are always easy to send along but then again a lot of people think along the same lines so there is never a shortage of these either. He asked if I could figure something out he could take in a crock-pot, and always being happy to oblige, I looked through my giant recipe files and decided on an old stand-by; Block Party Beans. 

I have made this countless times for potlucks, barbecues, and neighborhood get togethers since it easily feeds a crowd and people respond very well to this version. The ingredients are mixed up very quickly and then just "hang out" in the crock-pot. You can also bake them in the oven or cook them on top of the stove, whatever suits you best and makes you happy.

This time I just mixed everything together and gave it a quick heating on top of the stove since I knew it would be sitting a few more hours in the crock-pot. Serve them at your next BBQ or Potluck and watch everyone go nuts over a pot of beans.


Block Party Beans
~serves 12~

Ingredients:

2 lbs. lean ground beef (90% or leaner)
1 onion, chopped fine
4 garlic cloves, minced
4 (15 ounce) cans beans, drained and rinsed*
2 (28 ounce) cans tomato sauce
1/2 cup barbecue sauce (use your favorite one)
1/3 cup packed dark brown sugar
1/4 cup cider vinegar
1 teaspoon red pepper flakes
Kosher Salt and Pepper to taste
1 (10 ounce) package frozen lima beans

*I used a mix of beans. 1 can of the following: Black beans, red kidney beans, white kidney beans and pinto beans.

Directions:
Cook beef in Dutch oven over medium-high heat until no longer pink, about 8 minutes. Stir in onion and cook until softened, about 3 minutes. Add garlic and cook until fragrant, about 30 seconds. Stir in beans, tomato sauce, barbecue sauce, sugar, vinegar, pepper flakes, salt and pepper. Simmer covered until sauce is slightly thickened, about 30 minutes. Stir in lima beans and continue to cook, covered for another 20 minutes. Season with additional salt and pepper, if necessary. Serve.

*If you are using the oven, place dutch oven into a 350 degree F preheated oven after ingredients are added. Proceed with recipe.

** If you would rather use a crock-pot, cook beef, onion and garlic on the stove, then transfer to crock-pot.
Add additional ingredients and cook for 6 hours on low. Or you can prepare the recipe on the stove then add to a crock-pot for keeping warm.