"Cooking my way through life, one dish and new adventure at a time"
Showing posts with label healthy. Show all posts
Tuesday, March 4, 2014
St. Patrick's Day Chia Seed Pudding
I feel like I'm always a day late and a dollar short when it comes to food fads. What's in today, is out tomorrow. There has been a cupcake craze, the bacon craze, kale and green smoothies everywhere and the list goes on and on. Chia seeds have been around for quite a while, but I'm a novice when it comes to this ingredient.
I've known of chia seeds since I was little and chia pets made regular appearances in commercials. I did own a couple of them over the years and let me tell you, they never worked for me like they did on TV (#majorfail). So yes, I knew about chia, but it never crossed my mind to eat them.
For the last year or so, I've seen more and more recipes including these little seeds pop up all over the internet and they began to peak my interest. I started to do some research on them and to my surprise they are a super food. Who knew that these little buggers are chock full of Omega 3, can balance your blood sugar, keep you full longer, add age-defying anti oxidants as well as many other health benefits. Color me impressed!
So I figured I'll "ease" into it by starting with a fairly basic recipe for Chia Seed Pudding. There are a lot of recipes for this, but the gist is pretty much the same. Almond milk, yogurt, some kind of natural sweetener and of course chia seeds. Mix it up and let it sit overnight. The seeds do their magic thing after a few hours and you have this amazing concoction that is incredibly tasty on top of being healthy.
With St. Patrick's Day only a couple of weeks away I decided to add a little whimsy by matching my fruit topping to the colors of the Irish Flag. Kiwis, bananas and mandarin oranges along with a few toasted almonds for added crunch completed the pudding. The verdict: So freaking good! I think I have a new breakfast favorite and I can't wait to make this again. What a great way to wake up your family on St. Patrick's Day with this healthy breakfast.
St. Patrick's Day Chia Seed Pudding
~makes 4 servings~
(Print this Recipe)
Ingredients:
1 cup unsweetened almond milk
1 cup plain (2 percent) Greek Yogurt
2 Tbsp. pure maple syrup
1 tsp. vanilla extract
1/8 tsp. Kosher salt
1/4 cup chia seeds
3 small kiwis, peeled and chopped
1 large banana, peeled and cut into slices
1 (11 oz.) can mandarin oranges (no sugar added), drained
1/4 cup sliced almonds, toasted
2 tsp. pure maple syrup
Directions:
In a medium bowl, gently whisk the almond milk, yogurt, 2 tablespoons maple syrup, the vanilla extract and the 1/8 teaspoon of salt until just blended. Whisk in the chia seeds; let stand 30 minutes. Stir to distribute the seeds if they have settled. Cover and refrigerate overnight.
The next morning, in a small bowl, toss the toasted almonds with 2 teaspoons maple syrup. Set aside. Spoon the pudding into 4 glasses or bowls. Top with kiwis, bananas, and mandarin oranges. Mound the almonds on top and serve.
Slightly adapted from: Giada De Laurentiis
Labels:
almond milk,
bananas,
breakfast,
chia seeds,
family,
healthy,
kids,
kiwi,
mandarin oranges,
St. Patrick's Day,
yogurt
Tuesday, February 18, 2014
Mashed Cauliflower with Roasted Garlic & Goat Cheese
I have come to the conclusion that many times when people claim they don't like to eat certain vegetables, it really means they probably have never had it prepared in a way that would appeal to them. With so many different options and recipes available on how to turn an otherwise boring vegetable into a showstopper, it makes it hard to believe that an aversion against a certain food couldn't be overturned.
I think Cauliflower is a great example. By simply steaming the vegetable you end up with a "blah" version that can be kind of tasteless, but because of its mild flavor it can also be extremely versatile and lend itself to a lot of different and tasty applications. Recently there has been a surge in popularity for cauliflower. The florets are low in fat and carbs, high in fiber, folic acid and vitamin C, which makes this vegetable a winner in my book. If you perform a quick search, you can find an amazing variety of recipes. They range from roasted cauliflower, gratins, soups, dips, faux alfredo sauces and even pizza crust. While I've tried quite a few of these different versions, cauliflower pizza crust is still one that eludes me, but I will never say never.
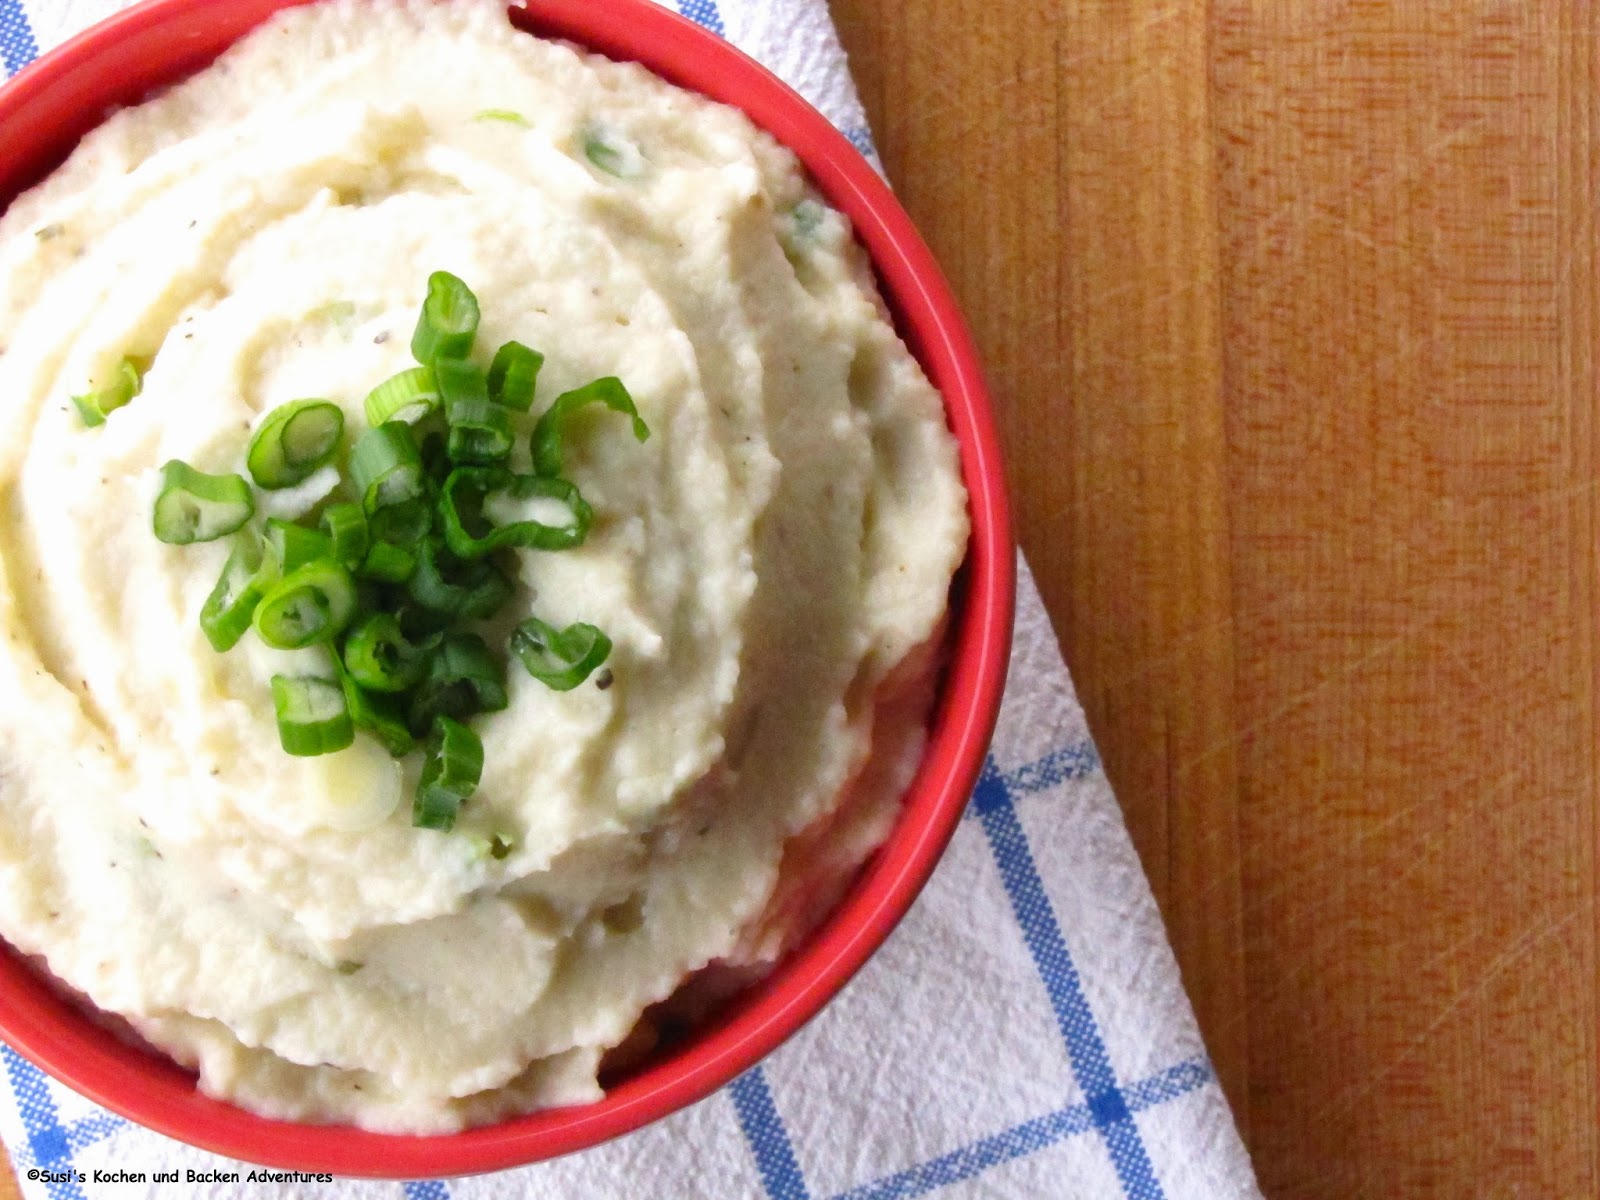
A few weeks ago I made Canadian Bacon Cauliflower Cheddar Cups for my family with great results, so I decided to experiment a little more and came up with this delicious mashed version. I started with a basic recipe, but by adding sweet, roasted garlic along with tangy and tart goat cheese, the dish was elevated to a whole new level. I achieved the desired consistency with my food processor, but an immersion blender or even a good old fashioned potato masher should do the trick as well. I served this with grilled steak and a big side salad, but ate leftovers with a couple of over-easy eggs the next day and had to restrain myself from licking the plate. So tasty, so simple, and most definitely one of my new favorites.
Mashed Cauliflower with Roasted Garlic & Goat Cheese
~makes 5-6 servings~
(Print this Recipe)
Ingredients:
5-6 cups cauliflower florets (about 1 medium head)
1 vegetable bouillon cube
8-10 roasted garlic cloves (see notes)
4 Tbsp. soft goat cheese
1/8 tsp. grated nutmeg
Kosher Salt and Pepper to taste
4 Tbsp. green onions, chopped
Directions:
Roast garlic (see note), remove cloves from skin and set aside.
On the stove-top, add cauliflower to a pot, fill with about 4 cups of water. Add the vegetable bouillon cube and steam/cook cauliflower until soft. Drain the cauliflower and add to a food processor.
Process cauliflower along with the roasted garlic cloves, goat cheese, 1/2 tsp. salt, 1/4 tsp. pepper and 1/8 tsp. nutmeg until smooth.
Transfer mixture to a bowl, check for additional salt and pepper and fold in 3 Tbsp. of the green onions. Sprinkle with additional reserved onions and serve immediately.
Notes: To roast the garlic, preheat oven to 400° F. Take one whole garlic bulb and cut 1/4 to 1/2 inch off the top. Lay on a piece of aluminum foil big enough to wrap the head of garlic, drizzle with about 1 tsp. of olive oil and season lightly with salt and pepper. Wrap it in the foil and roast in preheated oven for 35-45 minutes or until garlic is soft and golden brown. Let cool for about 15 minutes before handling. Use your fingers or a fork to squeeze and pull roasted garlic out of the skin.
If you don't like the taste of goat cheese, cream cheese would also be an acceptable substitution.
A Susi's Kochen und Backen Original Recipe
Labels:
cauliflower,
gluten free,
goat cheese,
healthy,
low-carb,
roasted garlic,
vegetables,
vegetarian
Friday, January 31, 2014
Canadian Bacon Cauliflower Cheddar Cups
Hi there, is this blog still on? I know, it's been forever and a day since you heard anything new from me, but a breather was much needed for my sanity. I won't be making any big promises about a regular posting schedule, but will say that I intend to keep popping in here when I have something interesting to share. Like today.
I came across these Canadian Bacon Cauliflower Cheddar Cups while thumbing through the newest Costco magazine. Let me tell you that they could have fooled anyone in my house. Unless you know that the filling has cauliflower in it, you could have mistaken it for mashed potatoes. I'm happy to report that they were gone in a flash and we all thoroughly enjoyed them.
Low-carb, gluten-free AND tasty, I don't think you can go wrong with these cute little appetizers. Serve them with a salad for a simple meal or as appetizers for a party. They might even make a great addition to your Superbowl Sunday menu. Go Seahawks!!!
Canadian Bacon Cauliflower Cheddar Cups
~Makes about 24~
Ingredients:
24 slices Canadian bacon
4 cups cauliflower florets
4 Tbsp. sour cream
2 Tbsp. fresh parsley, chopped
3 Tbsp. green onion, chopped
Kosher Salt and Pepper to taste
2 ounces cheddar cheese, grated
Directions:
Preheat oven to 375 F. Very lightly grease a 24-cup mini-muffin pan. Line each cup with a slice of Canadian bacon.
On the stovetop, add cauliflower to a pot, fill with about 2 cups of water. Add the vegetable bouillon cube and steam/cook cauliflower until very soft. Drain the cauliflower and add to a food processor.
Process cauliflower along with the sour cream, 1/2 tsp. salt and 1/4 tsp. pepper until well mixed and smooth.
Transfer mixture to a bowl and fold in the parsley and green onions. Taste for more salt and pepper and adjust accordingly.
Fill Canadian bacon cups with cauliflower mixture. Top each cup with cheddar cheese.
Bake for 15 minutes or until heated through. Let sit for a couple of minutes before serving.
Slightly adapted from: Costco Magazine
Labels:
appetizer,
cauliflower,
cheese,
gluten free,
healthy,
low-carb
Sunday, April 29, 2012
Quinoa Stuffed Portobello Mushrooms
I love mushrooms in every shape or form and Portobello mushrooms rank pretty high on my favorite foods list. I love how versatile they are and how you can turn them into a filling, delicious, vegetarian meal with very little effort. This recipe came about simply by checking the pantry and refrigerator. What started as a meal to get rid of a few extra vegetables, turned into an unforgettable dinner and inspired me to get back on this computer to write a short post.
While trying to come up with the finished recipe I decided to forgo the usual breadcrumbs as a binder and instead turned to Quinoa, which is quickly becoming one of my favorite grains to incorporate into recipes. By doing so, I was actually able to create a recipe which is not just vegetarian, but also gluten free. Served with a big salad on the side and bowl of watermelon this turned into a great meal that none of us will soon forget.
Quinoa Stuffed Portobello Mushrooms
~Serves 4~
Ingredients:
4 Large Portobello Mushrooms
1/2 cup Quinoa
1 cup Vegetable Broth
1 Tbsp. Olive Oil
1/2 Red Onion, diced
4 cups Baby Spinach, rough chopped
4 Tomatoes, seeded and diced
1/2 cup Fresh Basil, chiffonade
1/2 tsp. dried Oregano
Salt and Pepper
4 oz. Fresh Mozzarella, cubed
1/4 cup Parmesan, grated
Directions:
Clean Portobello mushrooms by removing the stem and cleaning out the gills and gently wiping the mushroom tops. Chop the stems and reserve.
Meanwhile bring 1/2 cup quinoa and 1 cup of vegetable broth to a boil in a small pot. Cover and simmer for 15 to 20 minutes, or until all the broth is absorbed. Take off the stove and cool to room temperature.
While the quinoa is cooking, heat 1 Tbsp. olive oil in a pan. Add the red onions, and cook until the onions begin to soften. Add the reserved chopped mushroom stems, spinach and tomatoes and saute until the spinach is wilted and the mixture is heated through. Season with oregano and salt and pepper to taste. Add the basil and remove from the stove. Gently stir in the quinoa and let everything cool to room temperature. Once the mixture has cooled, fold in the cubed mozzarella.
Take the cleaned mushroom caps and brush them lightly all over with olive oil. Season the inside with salt and pepper. Divide the filling equally into each mushroom cap.
Sprinkle each with Parmesan.
Grill for 15 minutes over medium heat or until the mozzarella starts melting and the mushrooms are heated through.
Serve immediately.
A Susi's Kochen und Backen Original Recipe
Labels:
dinner,
gluten free,
healthy,
mozzarella,
mushrooms,
quinoa,
spinach,
tomatoes,
vegetarian
Tuesday, April 20, 2010
Morning Glory Muffins
With school almost out for the summer and plenty of end of school year testing going on for all three of my children it is more important than ever to me that they leave the house having had a healthy breakfast that will have them all functioning well.
I've had this recipe for Morning Glory Muffins in my to-do list file for quite a while, and thought this was the perfect opportunity to go ahead and make them. They are bursting with good for you ingredients and are a great "on the go" breakfast.
The batter comes together very quickly, no mixer required. All you need is a couple of bowls, a wooden spoon and a whisk. While they are great right out of the oven they actually taste even better after sitting over night at room temperature. These muffins are low in calories (about 200 per muffin), low in fat (about 5 g), have a good amount of fiber (about 2.5 g) and are high in Vitamin A because of the carrots.* They are a wonderful start to the day.
My kids loved these and I felt good, knowing I sent them on their way with such a healthy breakfast in their tummy. Give them a try, they keep for a couple days well covered on the counter, or freeze them and take them out as needed.
Morning Glory Muffins
~makes 18 muffins~
Ingredients:
1 large egg
2 egg whites
1/2 cup unsweetened apple sauce
1/4 cup canola oil
1 tablespoon vanilla extract
1 1/2 cups all-purpose flour
1/2 cup whole wheat flour
1 1/4 cups white sugar
1 tablespoon ground cinnamon
2 teaspoons baking powder
1/2 teaspoon baking soda
1/2 teaspoon salt
2 cups carrots, shredded or grated
2 medium apples, shredded or grated
1 cup raisins
1/4 cup chopped walnuts
3 tablespoons wheat germ
1 tablespoon brown sugar
Directions:
Preheat oven to 375 degrees F. Lightly oil 18 muffin cups, or coat with nonstick cooking spray.
In a medium bowl, whisk together eggs, egg whites, apple sauce, oil, and vanilla.
In a large bowl, stir together flours, sugar, cinnamon, baking powder, baking soda, and salt. Stir in carrots, apples, and raisins. Stir in apple sauce mixture until just moistened. Spoon the batter into the prepared muffin cups, filling them about 3/4 full.
In a small bowl, combine walnuts, wheat germ, and brown sugar; sprinkle over the muffin tops.
Bake at 375 degrees F for 15 to 20 minutes, or until the tops are golden and spring back when lightly pressed.
Adapted from: All Recipes
Subscribe to:
Posts (Atom)